
If you’ve landed here trying to figure out how to fix leaky faucet two handle setups in your kitchen or bathroom, the good news is this is one of the most beginner-friendly plumbing repairs you can do. A two-handle faucet drips because something inside one of the two valve stems has worn out — usually a $2 rubber washer, an O-ring, or a cartridge. You don’t need a plumber, and you don’t need to replace the whole faucet. You just need to identify which handle is leaking, take it apart in the right order, and swap the worn part for a fresh one.
This guide walks you through the entire repair from diagnosis to reassembly, covers both compression and cartridge two-handle designs, and tells you exactly which parts to buy. By the end you’ll know not just how to stop the drip but why it started — so you can keep your fixtures running tight for years.
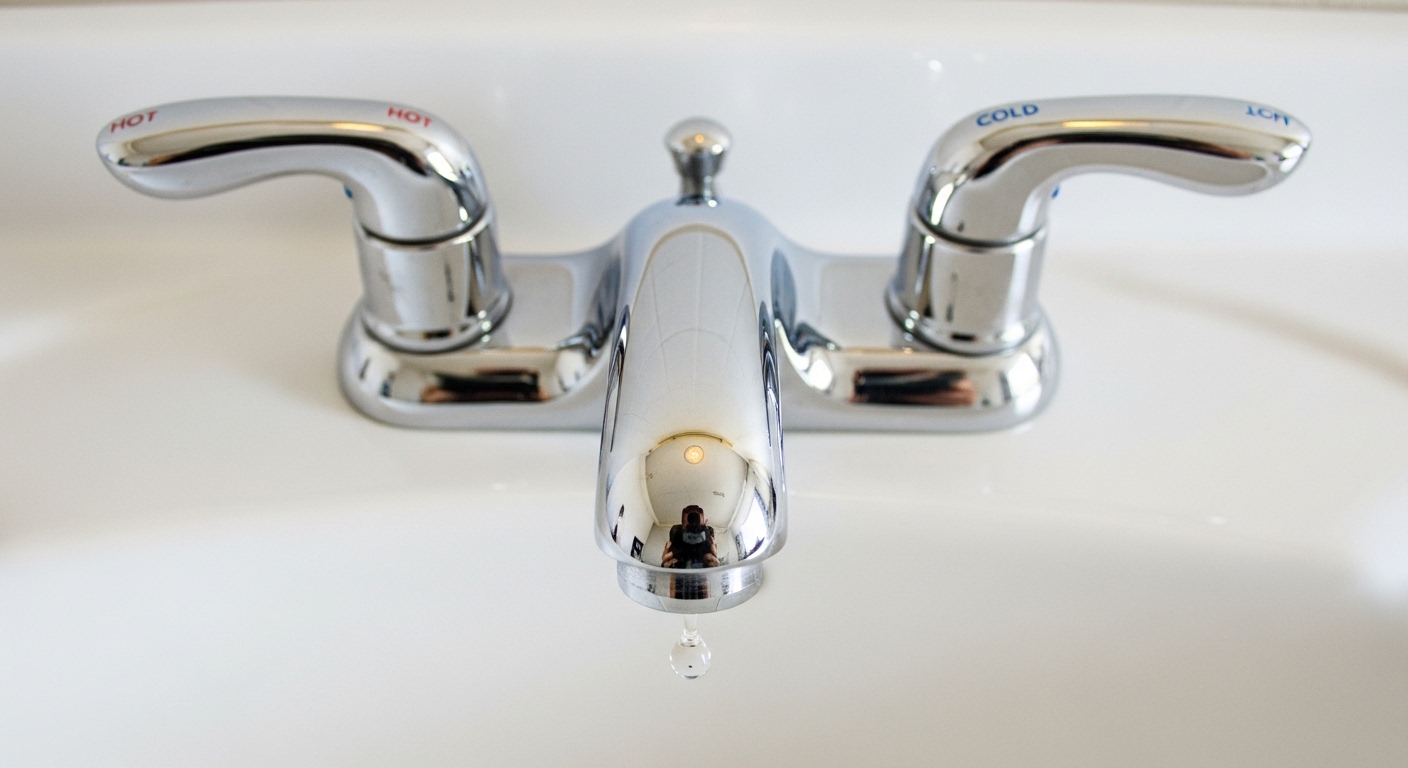
Why Is My Two-Handle Faucet Dripping Even When It’s Fully Closed?
Your two-handle faucet drips when fully closed because the seal inside one of the valve stems has failed. In a compression faucet (the older style with separate hot and cold knobs you screw down hard), this means the rubber washer at the bottom of the stem is cracked, flattened, or shredded. In a cartridge or ceramic-disc two-handle faucet, it means the cartridge’s internal seal or one of its O-rings has worn out.
Here’s the key diagnostic question: does the drip get worse when you turn one handle on slightly, or does it stay constant?
- Drip from the spout when both handles are off — worn washer or cartridge inside one stem. Touch the spout: if it feels warm, the hot side is leaking; cold means the cold side. Repair that side only.
- Water leaking from the base of a handle — the O-ring around the valve stem is shot. Easy fix, but you’ll need to pull the stem out.
- Water pooling under the sink — that’s a supply-line or shank-nut leak, not a valve leak. Different repair.
- Drip from under the spout where it swivels — spout O-rings need replacing (common on kitchen two-handle widespread faucets).
Knowing which of these you have decides everything else. Don’t tear the whole faucet apart if only the cold handle drips — work on the side that’s actually failing.
What Tools and Parts Do I Need to Fix a Two-Handle Faucet at Home?
You need a small flathead screwdriver, a Phillips screwdriver, an adjustable wrench, needle-nose pliers, and a set of replacement washers or a matching cartridge — total cost between $5 and $25 depending on the faucet style. Most homeowners already own the tools; the parts are the only thing you’ll likely need to pick up.
Here’s the complete kit, with realistic 2026 hardware-store prices:
| Item | Used For | Typical Cost |
|---|---|---|
| Flathead screwdriver (small) | Prying off decorative handle caps | $3–$6 |
| Phillips screwdriver | Removing handle screws | $3–$6 |
| Adjustable wrench (6″ or 8″) | Loosening packing nut / bonnet nut | $10–$18 |
| Allen key set | Set screws on modern handles | $5–$10 |
| Needle-nose pliers | Pulling out clips, O-rings | $8–$12 |
| Assorted washer kit | Compression faucet repair | $4–$8 |
| Replacement cartridge (brand-specific) | Cartridge faucet repair | $12–$35 |
| Plumber’s grease (silicone) | Lubricating O-rings on reassembly | $4–$7 |
| White vinegar | Dissolving mineral buildup on valve seats | $2 |
One tip that saves a second trip to the store: before you buy anything, take a phone photo of your faucet from a few angles. If it’s a branded fixture (Delta, Moen, Kohler, Pfister, or Avovida), look for a model number stamped on the underside of the spout or printed on the original paperwork. With the model number, you can buy the exact OEM cartridge instead of guessing. Generic washer kits are fine for old compression faucets, but cartridges are usually brand-specific.
How Do I Tell If My Faucet Is a Compression or Cartridge Type?
Turn the handle and feel how it moves: if you have to screw it down several full turns to shut the water off, it’s a compression faucet. If a quarter-turn or half-turn shuts it off cleanly, it’s a cartridge or ceramic-disc faucet. This is the single most important distinction because the repair steps are different.
Compression faucets are the classic design from the 1950s–1990s — still extremely common in older homes and in basic utility sinks. They use a rubber washer that physically presses against a brass valve seat to stop water. The washer wears out, so they drip more often than newer designs but are dirt-cheap to fix.
Cartridge two-handle faucets replaced compression designs starting in the late 1980s and are now standard on most mid-range and premium fixtures. Inside each handle is a sealed cartridge — typically a brass or plastic sleeve with internal rubber seals or ceramic discs. They last longer (10–20 years is normal) but when they fail, you replace the whole cartridge rather than a tiny washer.
Ceramic-disc cartridges are the premium subtype: two polished ceramic discs slide against each other to regulate flow. They’re rated for hundreds of thousands of on/off cycles and rarely fail unless sediment scratches the discs. If your faucet feels like a smooth, precise quarter-turn — that’s likely ceramic-disc.
Step-by-Step: How Do I Repair a Two-Handle Compression Faucet?
To repair a leaky two-handle compression faucet, shut off the water, remove the handle, unscrew the packing nut, pull out the stem, swap the worn washer at the bottom for a new one of the same size, and reassemble in reverse. The whole job takes about 30 minutes per side once you’ve done it once.
- Shut off the water. Look under the sink for two small shutoff valves (one hot, one cold). Turn both clockwise until they stop. Open the faucet handles to drain residual pressure and confirm the water is fully off. No shutoff valves under the sink? Shut off the main water supply to the house.
- Plug the drain. Drop the stopper or stuff a rag in the drain so you don’t lose tiny screws.
- Pop off the decorative cap. Most two-handle faucets have a small plastic or metal disc on top of the handle marked “H” or “C.” Slip a flathead screwdriver under the edge and pry gently.
- Remove the handle screw. Usually Phillips-head. Lift the handle straight up. If it’s stuck from mineral buildup, wiggle gently — never pry with brute force or you’ll crack the chrome.
- Unscrew the packing nut. This is the hex nut at the base where the stem meets the faucet body. Use your adjustable wrench, turning counterclockwise. Wrap the jaws in masking tape if you care about scratches.
- Pull out the valve stem. It should lift straight out. At the bottom you’ll see a brass screw holding a rubber washer.
- Inspect and replace the washer. If the washer is flat, cracked, hardened, or grooved — replace it. Unscrew the brass screw, swap in an identical-size washer from your kit, and tighten. While you’re there, check the O-ring around the stem too; replace it if it looks worn.
- Check the valve seat. Shine a flashlight down into the faucet body where the washer sits. If the brass seat looks pitted or rough, the new washer won’t seal either. You can resurface it with a valve-seat dresser ($8 tool) or replace the seat with a seat wrench.
- Reassemble in reverse. Stem in, packing nut tightened (snug, not gorilla-tight), handle on, screw in, cap on.
- Turn the water back on slowly. Open the shutoffs about halfway first, check for leaks, then open fully. Run both handles for 30 seconds to clear air from the lines.
If you’re working on an older sink and discovering corroded shutoffs or supply lines along the way, you may need to address those too — our companion guide on replacing a kitchen faucet that has copper supply lines walks through the full supply-side teardown if things get gnarlier than expected.
How Do I Replace the Cartridge in a Two-Handle Faucet?
To replace a cartridge in a two-handle faucet, shut off the water, remove the handle and any retaining clip or bonnet nut, pull the old cartridge straight up with pliers, drop in the new cartridge in the same orientation, and reinstall the handle. The repair takes 15–25 minutes per side.
The tricky parts are orientation and retention. Cartridges must go back in with hot and cold ports aligned correctly — if you rotate the cartridge 180°, your hot and cold will swap. Most cartridges have a flat or notch on top that lines up with the housing. Mark the old one’s orientation with a Sharpie before pulling it.
Retention varies by brand. Common styles:
- Horizontal clip: A small U-shaped brass or stainless clip slides in from the side. Pull it out with needle-nose pliers before the cartridge will lift.
- Threaded bonnet nut: A large hex nut screws down over the cartridge. Unscrew with your wrench.
- Snap-fit: No clip, no nut — just pull firmly straight up. Stubborn ones may need a cartridge-puller tool ($15).
When the cartridge feels stuck after years of mineral deposits, do not twist or pry sideways. Soak the area in white vinegar for 15 minutes to dissolve buildup, then pull straight up with steady force. A cartridge puller designed for your brand makes this trivial.
Before installing the new cartridge, smear a thin film of silicone plumber’s grease on the O-rings. This protects the rubber, eases installation, and significantly extends the life of the new part. Never use petroleum jelly — it degrades rubber.
What If the Leak Is Coming from the Spout Base, Not the Handles?
If water is leaking out from the base of the spout on a two-handle widespread or kitchen faucet, the spout O-rings are worn — not the valves. The fix is straightforward: lift the spout off and replace the two rubber O-rings around the spout stem with matching new ones, lubricated with plumber’s grease.
Here’s the sequence:
- Shut off the water under the sink.
- Locate the spout collar nut at the base — it might be hidden under a decorative ring you twist off, or held by an Allen-key set screw.
- Unscrew the collar nut or loosen the set screw.
- Pull the spout straight up. Wiggle gently — old O-rings get sticky.
- You’ll see one or two black rubber O-rings around the spout stem. Roll them off with your fingernail.
- Take the old O-rings to a hardware store to match the size exactly. Sizing is critical — too small leaks, too large prevents the spout from seating.
- Lubricate the new O-rings with silicone plumber’s grease.
- Slide them on, drop the spout back in, tighten the collar, and turn the water back on.
Kitchen faucets with side sprayers sometimes also leak at the sprayer hose connection under the sink — that’s a separate diverter or hose-clamp issue, not a spout problem. And while you’re under there checking finishes, give the chrome or brushed surface a quick once-over; we cover surface care in detail in our piece on how to protect faucet finishes from scratches, because the wrong cleaner can ruin a finish faster than years of normal use.
When Should I Repair vs. Replace the Whole Faucet?
Repair if the faucet is under 10 years old, has a working finish, and is a known brand with available parts. Replace it if it’s older than 15 years, has visible corrosion or pitting on the body, has had three or more repairs already, or if matching cartridges are no longer made. A new mid-range two-handle faucet runs $80–$250; cartridges run $15–$40.
| Situation | Best Move | Why |
|---|---|---|
| Drip on 5-year-old branded faucet | Repair | Cartridges cheap; finish still good; under warranty |
| Drip on 20-year-old generic faucet | Replace | Parts likely discontinued; corrosion inside; modern designs use less water |
| Cracked spout or corroded body | Replace | Structural failure can’t be patched safely |
| Pitted valve seats | Repair (resurface) or replace | Depends on severity; resurfacing is a one-time stopgap |
| You want a finish upgrade | Replace | Repair won’t change aesthetics |
| Hard-water buildup recurring quickly | Repair + add water filter | Address root cause, not symptom |
If you decide it’s time to swap the fixture entirely, the removal step is often where DIYers get stuck — corroded supply nuts and cramped cabinet space are the usual culprits. Our walkthrough on how to remove an old faucet kitchen setup covers the basin-wrench techniques that make the demolition phase painless. And if hard water is the underlying reason your washers keep failing every 18 months, a point-of-use solution like a wide faucet water filter can dramatically slow scale buildup on internal valve components.
How Do I Stop My Repaired Faucet from Leaking Again?
To prevent future leaks, don’t over-tighten the handles when you shut off the water, install a whole-house or under-sink water filter if you have hard water or sediment, and inspect O-rings during any future repair. Two-handle faucets fail because of friction and mineral abrasion — both of which you can control.
Specific habits that double or triple the life of your valves:
- Shut off gently. The valve seal only needs light contact to stop water. Cranking the handle hard each time crushes the washer faster.
- Wipe down handles weekly. Mineral deposits creep into the gap between handle and escutcheon and grind on the stem over time.
- De-scale annually. Soak aerators and visible parts in white vinegar for an hour each year. This keeps the whole valve system breathing cleanly.
- Filter your water. Sediment and high TDS dramatically shorten cartridge life. If you’re in a hard-water region, this is non-negotiable.
- Lubricate during reassembly. A dab of silicone plumber’s grease on every O-ring is the single biggest longevity upgrade.
- Use OEM cartridges when possible. Generics work, but original-equipment parts are usually held to tighter tolerances and last longer.
FAQ
How long does it take to fix a leaky two-handle faucet?
A first-timer should plan on 45–60 minutes including a hardware-store run; an experienced DIYer can complete a single-side cartridge swap in 15–20 minutes. The longest delay is usually identifying the correct replacement part, not the physical labor.
Can I fix a two-handle faucet without turning off the water?
No. You’ll spray your kitchen and risk damaging the faucet body. Always shut off the hot and cold supply valves under the sink first. If those valves are seized, shut off the main and budget an extra 10 minutes — and consider replacing those shutoffs while you’re already in there.
Why does my faucet still drip after I replaced the washer?
The valve seat (the brass ring the washer presses against) is probably pitted or grooved from years of mineral abrasion. A new washer can’t seal against a damaged seat. Either resurface the seat with a valve-seat dressing tool or swap the seat itself using a seat wrench — both are inexpensive fixes once you know to look for them.
Are universal replacement cartridges any good?
For older or off-brand faucets, generic cartridges often work fine. For major brands like Moen, Delta, Kohler, and Pfister, OEM cartridges are worth the extra $5–$10 — fit and longevity are noticeably better, and many manufacturers void the lifetime warranty if you use third-party parts.
Is a dripping faucet really worth fixing right away?
Yes — a single drip per second wastes roughly 3,000 gallons per year, drives up your water bill, and slowly etches a stain into your sink. Beyond the cost, a hot-side drip wastes the energy used to heat that water, so fixing it pays for itself in a few months.
Can I convert an old compression faucet into a cartridge faucet?
Not without replacing the whole fixture. The internal architecture is completely different. If you’re tired of replacing washers every couple of years, just upgrade to a modern two-handle cartridge or ceramic-disc faucet — installation in an existing pre-drilled sink takes about an hour.
What’s the warranty on a repaired faucet?
Most major manufacturers offer a limited lifetime warranty on the faucet body and finish, plus 5–10 years on internal mechanisms — and that warranty typically survives DIY washer/cartridge replacement as long as you used compatible parts. Avovida fixtures carry a limited lifetime warranty on body, finish, and original cartridge, tested to industry-standard ASME A112.18.1 / CSA B125.1 specifications for valve life and flow performance.
A Quick Note on Trust
This guide was written by the Avovida product team — engineers and former plumbing-supply pros who’ve taken apart literally thousands of two-handle faucets across two decades, from 1970s compression Crane fixtures to current ceramic-disc widespread sets. Every step above has been performed on real sinks, not copied from a manufacturer’s spec sheet. Avovida designs and tests its own faucet line to ASME A112.18.1 / CSA B125.1 standards (the same standards Delta, Moen, and Kohler test to), and we publish cartridge cycle-life test results for every product. If you’re researching a future upgrade after this repair, our best kitchen faucet reviews 2025 roundup and our best Delta bathroom faucet comparison are both written with the same hands-on standard.
Fix the drip, save the water, and enjoy a fixture that works the way it was designed to. If you hit a snag halfway through a repair and need an OEM part match, drop us a line through avovida.net with the photo of your cartridge — we’ll help you ID it.