
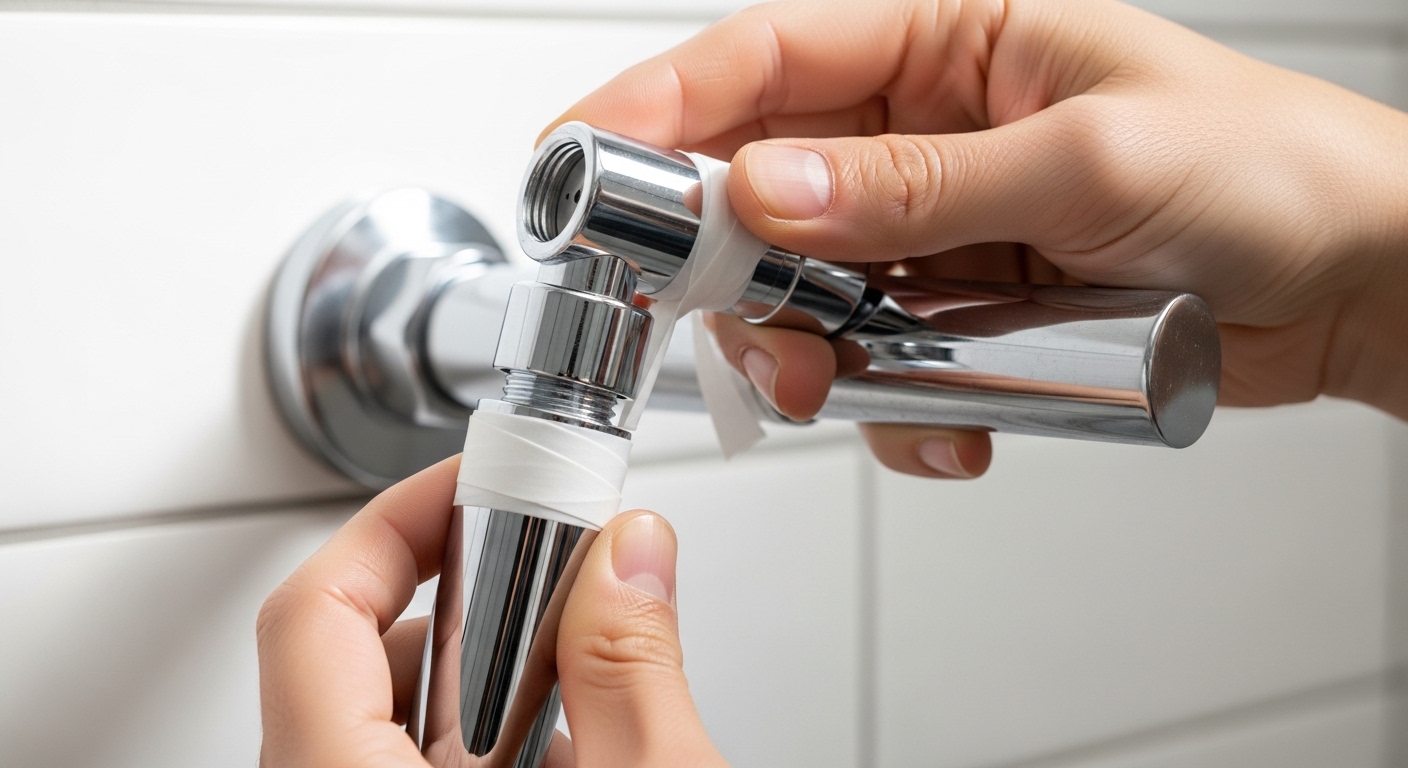
If you want a handheld shower head no drill setup, the good news is that it’s one of the easiest bathroom upgrades you can make — easier than changing a light bulb, honestly. You’re not touching the wall at all. The shower arm (that chrome pipe already sticking out of your wall) does all the work: it threads onto a standard connection, and the cradle that holds your handset simply slips over that arm or hangs from it. Below I’ll walk you through exactly how it goes on, which mounting styles actually stay put, what to buy for renters versus homeowners, and the few mistakes that cause a handset to droop or a head to drip.
Can you really install a handheld shower head without drilling any holes?
Yes — and for most bathrooms it’s the standard way to do it. Nearly every wall-mounted shower in the U.S. already has a threaded shower arm with a universal ½-inch NPT connection. A no-drill handheld kit screws onto that exact thread, so you reuse the plumbing that’s already there instead of opening the wall.
The only part that ever tempts people to drill is the holder for the handset. But you don’t need to. There are three drill-free ways to hold the wand, and all of them anchor to the shower arm or the head itself, not the tile:
- Over-the-arm bracket: A small cradle that sits on the shower arm, sandwiched between the wall and the shower head when you tighten it. The handset clips in. Zero wall contact.
- Integrated holder head: The fixed shower head and the handset holder are one piece — you replace the whole head, and the cradle comes built in.
- Tension or adhesive slide bar: A height-adjustable bar that mounts with strong adhesive pads or a tension fit rather than screws (better for homeowners who want the spa look without holes).
So the wall stays untouched. That’s why this approach is so popular with renters, in apartments with tile you don’t want to crack, and with anyone who just wants a quick weekend swap.
What do you actually need to buy, and what’s in the box?
You need a handheld shower head kit that includes the handset, a flexible hose, and an over-the-arm bracket or an integrated holder — that’s the complete no-drill package. Most kits priced between $25 and $70 include all three plus a rubber washer and sometimes plumber’s tape.
Here’s the typical parts list and what each piece does:
- Handset (the wand): The sprayer you hold. Look for multiple spray modes if you want a massage or rinse setting.
- Flexible hose: Usually 60 to 80 inches of stainless or reinforced PVC. Longer is better for bathing kids, pets, or rinsing the tub.
- Over-the-arm bracket or mount: The drill-free cradle. Confirm the kit includes one — some “handheld only” listings assume you already have a holder.
- Washers and seals: The rubber rings that prevent drips at each connection.
- Plumber’s tape (PTFE tape): Wraps the threads for a leak-free seal. If it’s not in the box, buy a roll for about $2.
One spec to check before you buy: U.S. shower arms are almost universally ½-inch NPT, so most kits fit. If you live in an older home or outside the U.S., measure your thread or check the listing for “G1/2” compatibility. And look for a flow rate at or below 2.5 GPM (or 1.8 GPM in water-restricted states like California and Colorado) so the head is legal and efficient where you live.
How do you install a handheld shower head with no drill, step by step?
You unscrew the old head, wrap the shower-arm threads with plumber’s tape, hand-tighten the new bracket and head onto the arm, then attach the hose and handset — the whole thing takes about five minutes. Here’s the full sequence:
- Remove the old shower head. Turn it counterclockwise by hand. If it’s stuck, grip the arm with a cloth (to protect the finish) and use pliers gently. Removing an old fixture is the same basic motion whether it’s a head or a spout — the same careful, finish-first approach you’d use when you remove an old kitchen faucet setup applies here.
- Clean the threads. Wipe off old tape and mineral gunk from the shower arm so the new seal sits clean.
- Wrap with plumber’s tape. Wind PTFE tape clockwise around the arm threads three to four times. This is the single most important step for a drip-free joint — skip it and you’ll get a slow leak at the wall.
- Attach the over-the-arm bracket. Slide the bracket onto the arm so it rests against the wall, then thread the shower head or diverter on to lock it in place.
- Hand-tighten the connection. Screw on clockwise until snug, then a quarter-turn more by hand. Don’t crank it with a wrench — you’ll crush the washer and cause leaks, not stop them.
- Connect the hose and handset. Attach one end of the hose to the head/diverter outlet and the other to the wand, each with its washer seated inside.
- Test it. Run warm water for 30 seconds. Watch every joint. A single drip almost always means a washer is missing, pinched, or the joint needs another small hand-turn.
That’s it. No anchors, no holes, no patching when you move out. If you do see a drip at the wall connection and re-tightening doesn’t fix it, the culprit is nearly always the tape or washer — the same leak logic that applies when you fix a leaky two-handle faucet without calling a plumber: it’s a seal problem, not a “tighten harder” problem.
Will a no-drill handheld shower head actually stay up, or will it droop?
A properly installed over-the-arm or integrated holder will hold the handset securely for years — the weight is supported by the steel shower arm, not by adhesive or tile. Drooping only happens for one of three avoidable reasons:
- The bracket wasn’t tightened. If the over-the-arm cradle spins loose, the head tips. Snug the connection and it stops.
- You used a cheap adhesive hook instead of an arm-mounted bracket. Stick-on hooks on tile fail over time as steam loosens the glue. Arm-mounted brackets don’t have this problem because nothing is glued.
- The handset is heavier than the cradle is rated for. An all-metal wand in a thin plastic clip can sag. Match a metal handset with a metal or firmly-gripping cradle.
If you specifically want the wand to grab and release with zero fiddling, consider a magnetic dock instead of a friction clip — I compared the two in depth in is a handheld shower head magnetic dock actually better than a standard holder. The short version: magnetic docks are easier for kids and anyone with limited grip strength, and they still mount with no drilling.
No-drill mounting styles compared: which one is right for you?
The best no-drill mount depends on whether you rent or own, and whether you want adjustable height. Here’s how the common options stack up:
| Mount type | How it holds | Best for | Height adjustable? | Typical price |
|---|---|---|---|---|
| Over-the-arm bracket | Hangs on the shower arm under the head | Renters; fastest install | No (fixed at arm height) | $25–$45 |
| Integrated holder head | Cradle built into a replacement head | Clean look, one-piece swap | No | $35–$70 |
| Magnetic dock kit | Magnet on arm-mounted base grabs wand | Kids, seniors, easy one-hand use | Sometimes | $40–$80 |
| Adhesive slide bar | Heavy-duty adhesive pads on tile | Homeowners wanting adjustable height, no holes | Yes | $50–$120 |
| Tension-rod style holder | Pressure fit, no glue or screws | Smooth surfaces, fully removable | Limited | $30–$60 |
For most renters, the over-the-arm bracket wins on simplicity and price. If you own the home and want the wand to slide up and down to different heights — great for a tall-and-short household — an adhesive slide bar gives you that flexibility without drilling, though you’ll want to clean and dry the tile thoroughly before pressing the pads on.
Is a no-drill handheld shower head a good choice for renters and apartments?
Yes — a no-drill handheld is close to the perfect rental upgrade because it’s reversible, leaves no damage, and you take it with you when you move. You keep your landlord’s original head in a drawer, install yours in five minutes, and swap the old one back on move-out day. No deposit risk, no patching.
A few renter-specific tips:
- Save the original head. Bag it with its washer so you can restore it later.
- Choose finishes that match your other fixtures. If your tub spout and handles are chrome, a chrome handset blends in; if they’re warmer tones, it’s worth looking at how a finish reads in your room — the same reasoning that makes people weigh whether a polished nickel faucet bath setup is worth it applies to picking a shower handset finish.
- Protect the finish during install. Wrap pliers in cloth so you don’t scratch the arm or head. If you do nick a finish, here’s how to protect faucet finishes from scratches going forward.
Because nothing is permanent, you can also experiment. Don’t love the spray pattern? Swap the handset again in minutes. That low commitment is exactly why no-drill handhelds are the most-recommended shower upgrade for apartment living.
What about water pressure, spray modes, and hard water?
A no-drill handheld won’t lower your water pressure on its own — pressure is set by your plumbing, not the mount — but the handset’s spray modes and nozzle design strongly affect how the water feels. If you have low pressure, look for a head specifically tuned to concentrate flow; if you have hard water, prioritize silicone (rubber) nozzles you can rub clean with a thumb.
What to look for:
- Spray modes: Most decent handhelds offer 3 to 6 settings — full rinse, massage, mist, and a trickle “pause” mode that’s handy for shaving or saving water.
- Pressure-friendly design: Heads with fewer, larger nozzles tend to feel stronger at low pressure than ones with dozens of pinholes.
- Anti-clog nozzles: Soft silicone tips shed mineral buildup. Hard plastic nozzles clog and spray sideways over time, especially in hard-water areas.
- Self-pause button: A trickle button on the wand lets you stop flow without losing your temperature setting.
If your water leaves white crust on everything, a handheld with cleanable nozzles plus periodic soaking in white vinegar keeps the spray even for years. Hard water is the number-one reason handheld heads weaken over time, and it’s entirely manageable.
Author note & why you can trust this guide
This guide was written by the Avovida fixtures team, drawing on hands-on installs of dozens of handheld and fixed shower heads across chrome, brushed nickel, and matte black finishes. Avovida is a B2C bathroom and kitchen fixtures brand focused on faucets, shower heads, and tub fittings, and we test products against the same standards we’d want in our own homes.
On standards and warranty: look for shower heads that meet the U.S. EPA WaterSense flow standard (1.8 GPM) where required, and check that the connections are certified to ASME A112.18.1 / CSA B125.1, the North American plumbing-fixture standard. A reputable handheld kit should carry at least a limited lifetime warranty on the finish and a multi-year warranty on the hose and cartridge — if a listing offers no warranty at all, treat that as a red flag.
FAQ
Do all shower arms fit a no-drill handheld shower head?
Almost all U.S. shower arms use a standard ½-inch NPT thread, which fits the vast majority of handheld kits. If your home is older or overseas, measure the thread or confirm the listing supports G1/2 connections before buying.
How long does it take to install a handheld shower head with no drill?
About five minutes for most people. Unscrew the old head, wrap the threads with plumber’s tape, hand-tighten the new bracket and head, attach the hose and handset, and test for leaks. No tools are required beyond optionally a cloth-wrapped pair of pliers for a stuck old head.
Will a no-drill handheld leak at the wall connection?
Not if you wrap the shower-arm threads with PTFE plumber’s tape three to four times and hand-tighten snugly. If it does drip, the fix is almost always re-taping or reseating a pinched washer — never cranking it harder with a wrench, which can crack the seal.
Can I leave my landlord’s plumbing untouched?
Yes. A no-drill handheld only screws onto the existing shower arm and is fully reversible. Keep the original head and washer, and you can restore it in minutes when you move out, leaving zero wall damage.
Is a magnetic holder or a clip-in cradle better for a handheld?
A clip-in over-the-arm cradle is cheaper and rock-solid, while a magnetic dock is easier to use one-handed and great for kids or anyone with limited grip strength. Both mount with no drilling — choose based on convenience versus budget.
Does a handheld shower head lower my water pressure?
No — the mount and handset don’t change your home’s water pressure. How strong the water feels depends on the nozzle design, so for low-pressure homes pick a head with fewer, larger nozzles and a concentrated spray mode.