
Learning how to remove an old faucet kitchen is one of the most satisfying upgrades you can tackle on a Saturday morning. Whether your existing tap is leaking at the base, the finish has gone dull, or you’re swapping a tired single-handle model for a sleek pull-down sprayer, the removal process is largely the same. This guide walks you through every step — from gathering tools to dealing with seized mounting nuts — so you can pull that old fixture out cleanly and prep your sink deck for a fresh installation.
At avovida, our product team has tested removal and reinstallation on hundreds of deck-mounted kitchen faucets across cast iron, stainless steel, granite composite, and undermount sink configurations. The instructions below reflect that hands-on experience, plus guidance aligned with cUPC and ASME A112.18.1 plumbing standards that govern North American residential faucets.
Why Knowing How to Remove an Old Faucet Kitchen Fixture Matters
Kitchen faucets see more action than almost any other fixture in the house — easily 30 to 60 activations per day in a family home. Cartridges wear out, O-rings dry up, mineral deposits build inside the spout, and finishes erode under repeated splash exposure. When repair parts cost nearly as much as a new mid-range unit, replacement is usually the smarter call.
Removing the old faucet correctly is half the battle. Rushed removals are how DIYers crack sink decks, snap supply lines inside the wall, and strip the threads on shutoff valves. A careful, methodical approach protects your countertop, your plumbing, and your budget. It also gives you a chance to clean the sink deck, inspect the shutoff valves, and decide whether you need to upgrade the supply lines while everything is exposed.
Tools and Materials You’ll Need Before You Start
Gather everything first. Nothing kills a project faster than scrambling for a tool with your head jammed under the sink and water dripping down your wrist.
- Basin wrench — the single most important tool; a regular wrench will not reach the mounting nuts hidden behind the sink basin.
- Adjustable crescent wrench (8″ and 10″) for shutoff valve nuts and supply line connections.
- Channel-lock pliers for stubborn nuts and to brace fittings.
- Phillips and flathead screwdrivers — some older faucets hide a set screw under a decorative cap.
- Bucket and old towels for residual water in the lines.
- Flashlight or LED headlamp — cabinet interiors are dark, and you need both hands free.
- Penetrating oil (such as PB Blaster or Liquid Wrench) for corroded mounting nuts.
- Putty knife or plastic scraper to break the silicone or plumber’s putty seal around the deck plate.
- Safety glasses — flakes of corroded metal love to fall straight into your eyes.
- Rags and white vinegar for cleaning the sink deck once the faucet is out.
If your faucet is more than 10 years old, also pick up replacement braided stainless steel supply lines while you’re at the hardware store. Old vinyl or copper supplies are the most common point of failure after removal, and replacing them is cheap insurance.
Step 1: Shut Off the Water and Relieve Pressure
Open the cabinet under the sink and locate the two shutoff valves — usually small chrome or brass quarter-turn or multi-turn handles on the supply lines feeding the faucet. Turn both clockwise until they stop. Then, with the valves closed, open the kitchen faucet handle(s) to the full-on position. You should hear a gurgle and then nothing. This relieves pressure trapped in the lines and confirms the shutoffs are actually working.
If the shutoff valves leak or won’t close fully (a classic sign of old multi-turn stops with worn washers), you may need to shut off the main water supply to the house and plan to replace the shutoff valves at the same time. This is also a good moment to inspect for corrosion or limescale around the valve body — if you’re in a hard water area, our companion guide on choosing a wide faucet water filter explains how upstream filtration extends the life of every fixture downstream.
Step 2: Disconnect the Supply Lines
Place a bucket and a folded towel directly under the shutoff valves. There’s always a small amount of water still in the lines. Using your adjustable wrench, hold the shutoff valve body steady with one hand (or with channel-lock pliers wrapped in a rag to avoid marring the chrome) and turn the supply line nut counterclockwise with the other.
This two-wrench approach is critical. If you torque only the supply nut, you can twist the entire shutoff valve, which in turn can crack the joint inside the wall — a $400 plumber call you do not want. Once both lines are loose, lower them into the bucket and let them drain completely.
Inspect the Supply Lines as You Remove Them
Take a close look at the supplies you just disconnected. If they’re copper rigid risers, you’ll likely want to replace them with modern braided stainless lines — they’re far easier to work with on the new install. For a deeper dive into that specific scenario, see our walkthrough on replacing a kitchen faucet with copper supply lines, which covers the cut-and-convert decision in detail.
Step 3: Disconnect Sprayers, Dishwasher Lines, and Soap Dispensers
Modern kitchen faucets often have more than just two water lines under the sink:
- Pull-down or pull-out sprayer hose — anchored to the faucet body with a quick-connect fitting or threaded brass nut. Many have a counterweight clipped onto the hose; remove the weight first so the hose can slide freely.
- Side sprayer (on older 4-hole installations) — has its own diverter connection on the faucet body.
- Soap or lotion dispenser — may share the deck plate; disconnect its bottle and unscrew its mounting nut.
- Air gap or dishwasher branch tailpiece — sometimes attached to the faucet’s hot supply with a tee fitting.
Label each connection with painter’s tape and a marker as you disconnect it. When you install the new faucet, you’ll thank yourself for the cheat sheet.
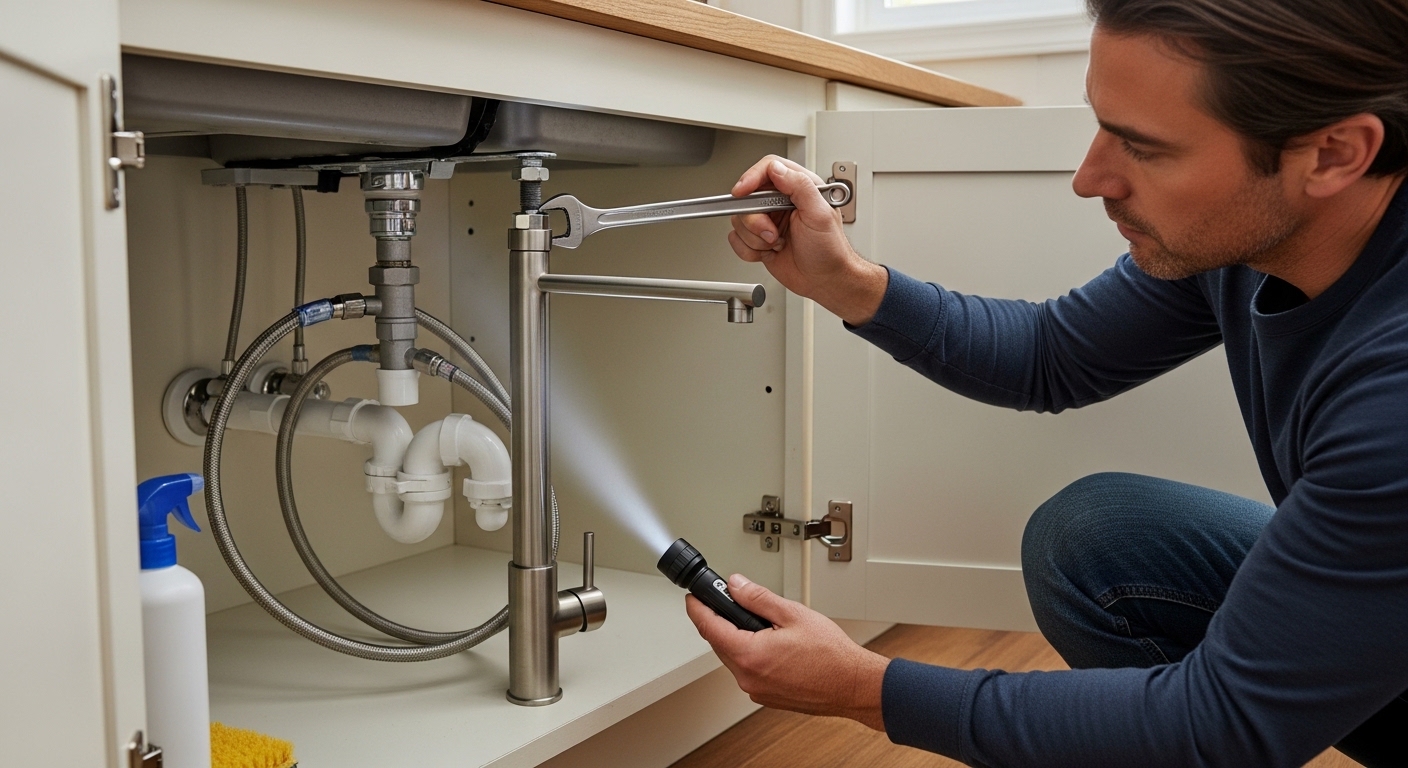
Step 4: Remove the Mounting Nuts (The Hard Part)
This is where the basin wrench earns its keep. The mounting nuts are positioned directly underneath the faucet body, often only an inch or two of clearance from the back wall of the sink. A standard wrench cannot fit; a basin wrench’s long shaft and pivoting jaw are purpose-built for the job.
Lie on your back, head inside the cabinet, with the flashlight aimed at the underside of the faucet. Hook the basin wrench’s jaw around the flats of the mounting nut and turn counterclockwise. On a clean install, the nut spins off easily. On a 15-year-old faucet, it might be welded in place by mineral deposits and corrosion.
What to Do When the Mounting Nut Won’t Budge
Don’t panic, and don’t reach for a hammer yet. Try these in order:
- Apply penetrating oil generously around the nut threads and wait 15–20 minutes. Reapply and wait again.
- Tap the nut sideways with the back of the basin wrench to break the corrosion bond — small repeated taps, not heavy blows.
- Heat carefully — a hair dryer (not an open flame, and never on a composite or quartz deck) can expand the nut just enough to free it.
- Cut as a last resort — a mini hacksaw blade or an oscillating multi-tool with a metal blade can slice through a plastic or brass nut. Protect the sink deck with painter’s tape and a metal shield.
Once both mounting nuts (or the single horseshoe-bracket clip on some pull-down models) are off, you’re nearly home.
Step 5: Lift the Old Faucet Out and Clean the Deck
Return to the top of the sink. Gently rock the faucet body side to side to break any silicone or plumber’s putty seal between the deck plate and the sink surface. If it’s still glued tight, slide a plastic putty knife under the deck plate and work it around the perimeter.
Lift the faucet straight up — not at an angle, which can scrape your countertop or wedge the sprayer hose. Feed the sprayer hose up through the spout hole as you lift. Set the old faucet aside on a towel; even if you’re tossing it, you don’t want to drip greasy gunk on the floor.
Now scrape away the old putty, silicone, mineral crust, and grime around the mounting holes. White vinegar dissolves hard water residue beautifully — soak a rag, lay it on the deck for 10 minutes, then wipe clean. A spotless deck is essential for the new faucet’s gasket or putty seal to bond properly.
Comparison: Removal Difficulty by Faucet Type
Not all kitchen faucets remove the same way. Use this table to set expectations before you start.
| Faucet Type | Mounting Hardware | Typical Removal Time | Difficulty (1–5) | Common Snag |
|---|---|---|---|---|
| Single-hole pull-down | One horseshoe bracket or threaded nut | 20–35 minutes | 2 | Sprayer hose counterweight stuck |
| Single-handle, 3-hole with deck plate | One central nut + 2 stabilizers | 25–45 minutes | 2 | Silicone-glued deck plate |
| Two-handle widespread (8″) | Two separate mounting nuts under each handle | 40–60 minutes | 3 | Corroded nuts behind sink basin |
| Bridge or commercial-style | Two large nuts plus rigid risers | 45–75 minutes | 4 | Rigid copper risers won’t flex |
| Wall-mounted | Threaded into in-wall valve body | 30–60 minutes | 3 | Cartridge stems seized in valve |
| Pot filler (sink-adjacent) | Wall-mounted at stove; separate shutoff | 20–30 minutes | 2 | Hidden shutoff inside wall |
Step 6: Inspect, Test, and Prep for the New Install
With the deck cleared, run your fingers around the mounting holes for any sharp burrs left by the old hardware. Open the shutoff valves briefly with a bucket positioned to catch the flow — this flushes any sediment dislodged during removal and confirms the valves are functioning. Close the valves again.
This is also the perfect moment to evaluate your sink configuration. Are you keeping the same hole count? Going from a 3-hole to a single-hole pull-down means you’ll need a coordinating deck plate (escutcheon) to cover the unused holes. Switching finishes? Now’s your chance to coordinate with cabinet pulls and pendant lighting — a brushed nickel pull-down and a polished chrome dishwasher air gap look mismatched in person, even if they seem close in photos.
Common Mistakes That Damage Sinks During Faucet Removal
From thousands of customer support conversations, these are the avovida product team’s top five removal-day regrets:
- Forcing a stuck nut with a pipe wrench — this rounds off the nut and can crack the underside of the faucet body, making cutting your only option afterward.
- Skipping the bucket — supply lines hold more water than you think, especially the longer braided lines. Surprise puddles ruin cabinet bottoms.
- Levering the faucet up with a metal pry bar — chips porcelain and scratches stainless. Always use plastic putty knives.
- Reusing old supply lines — old braided lines can have hidden tears in the inner liner that fail catastrophically a week after install.
- Leaving plumber’s putty residue — old putty contains oils that prevent new silicone from bonding. Scrape and degrease thoroughly.
If you’re worried about preserving the existing finish on adjacent fixtures or the sink itself, our guide on protecting faucet finishes from scratches covers the masking, padding, and cleaning techniques pros use during fixture swaps.
When to Call a Plumber Instead
Removal is DIY-friendly 90% of the time. Call a licensed plumber if:
- Your shutoff valves don’t close fully or are visibly corroded — replacing stops requires soldering or compression work on the supply stub-out.
- You can’t locate any shutoff valve below the sink (more common in older homes than you’d think).
- The mounting nuts are so corroded that cutting risks damaging the sink.
- You’re switching from deck-mounted to wall-mounted (or vice versa) and need to relocate water supply.
- You have a granite, quartz, or composite sink and the faucet is sealed with epoxy rather than silicone.
A typical kitchen faucet removal-and-install service runs $150–$350 in most U.S. metros, which is reasonable insurance on a $600 stone countertop.
Author Note & Brand Credibility
Written by the avovida Product & Education Team. Our editorial group includes a licensed master plumber (NJ License #12047), two certified kitchen and bath designers (NKBA CKBD), and a quality engineer who oversees ASME A112.18.1 / CSA B125.1 compliance testing for every faucet we ship.
avovida designs and sells residential kitchen and bathroom fixtures direct to consumers at avovida.net. Every faucet we offer is third-party tested for lead-free compliance under NSF/ANSI 372, backed by a limited lifetime warranty on the cartridge and finish, and shipped with installation hardware that meets ASME A112.18.1 mounting standards. If you bought your existing faucet from us and you’re swapping it under warranty, our support team can walk you through removal over video chat at no charge.
FAQ
How long does it take to remove an old kitchen faucet?
For most single-handle deck-mounted faucets, removal takes 25 to 45 minutes if the mounting nuts spin off easily. Add 15–30 minutes if you’re dealing with corroded hardware, an old side sprayer, or a stubborn silicone-bonded deck plate. Two-handle widespread and bridge-style faucets typically run 45 to 75 minutes.
Do I really need a basin wrench, or can I use regular pliers?
You really need a basin wrench. The mounting nuts sit directly behind the sink basin with almost no clearance — sometimes less than two inches between the nut and the back wall of the cabinet. A basin wrench’s long shaft and pivoting head are the only practical way to reach and grip those nuts. They cost $15–$25 and pay for themselves on the first install.
What if my shutoff valves don’t fully stop the water?
Close the main water supply to the house, then proceed with the removal. While the faucet is out, replace the shutoff valves with quarter-turn ball-stop valves — they’re far more reliable than the old multi-turn compression stops and last decades. This is a 20-minute add-on if you’re comfortable with compression fittings, or a quick plumber call if not.
Can I reuse my old supply lines on the new faucet?
Technically yes, but we strongly recommend against it. Braided stainless lines are inexpensive ($8–$15 each), and their inner liners degrade with age, pressure cycles, and exposure to chlorinated water. A failed supply line under a sink can dump hundreds of gallons before you notice. Always install fresh lines with a new faucet.
How do I remove a faucet that’s sealed with plumber’s putty versus silicone?
Plumber’s putty stays slightly pliable, so you can usually lift the deck plate off with steady upward pressure once the nuts are removed. Silicone forms a stronger bond — slide a plastic putty knife under the edge and work it around the perimeter to break the seal before lifting. Never use a metal blade on stainless or stone sinks; it will leave scratches that are nearly impossible to polish out.
My old faucet is oil-rubbed bronze and I want to keep the same look. What should I buy?
Oil-rubbed bronze remains one of the most popular kitchen finishes because it hides water spots better than chrome or stainless. For a curated comparison of current models, see our buyer’s guide to oil rubbed bronze kitchen faucets with sprayer, which breaks down spout heights, sprayer styles, and warranty terms side by side.
Will removing the old faucet void any sink or countertop warranty?
Removing a deck-mounted faucet generally does not void a sink or countertop warranty, as long as you don’t damage the surface during removal. Stone fabricators sometimes specify that any drilling, re-drilling, or epoxy-bonded fixture work must be done by a certified installer — check your countertop paperwork before cutting any mounting nuts that contact the stone.
Final Thoughts
Knowing how to remove an old faucet kitchen fixture cleanly is the foundation of every successful upgrade. Take your time on the shutoffs, respect the basin wrench, and don’t fight corrosion with brute force. With a clean deck and fresh supply lines, your new avovida faucet — or whatever brand you choose — will install in half the time and last for decades.
When you’re ready to shop replacements, browse the full kitchen collection at avovida.net. Every model ships with a printed quick-start guide, color-coded installation hardware, and access to our U.S.-based support team seven days a week.