
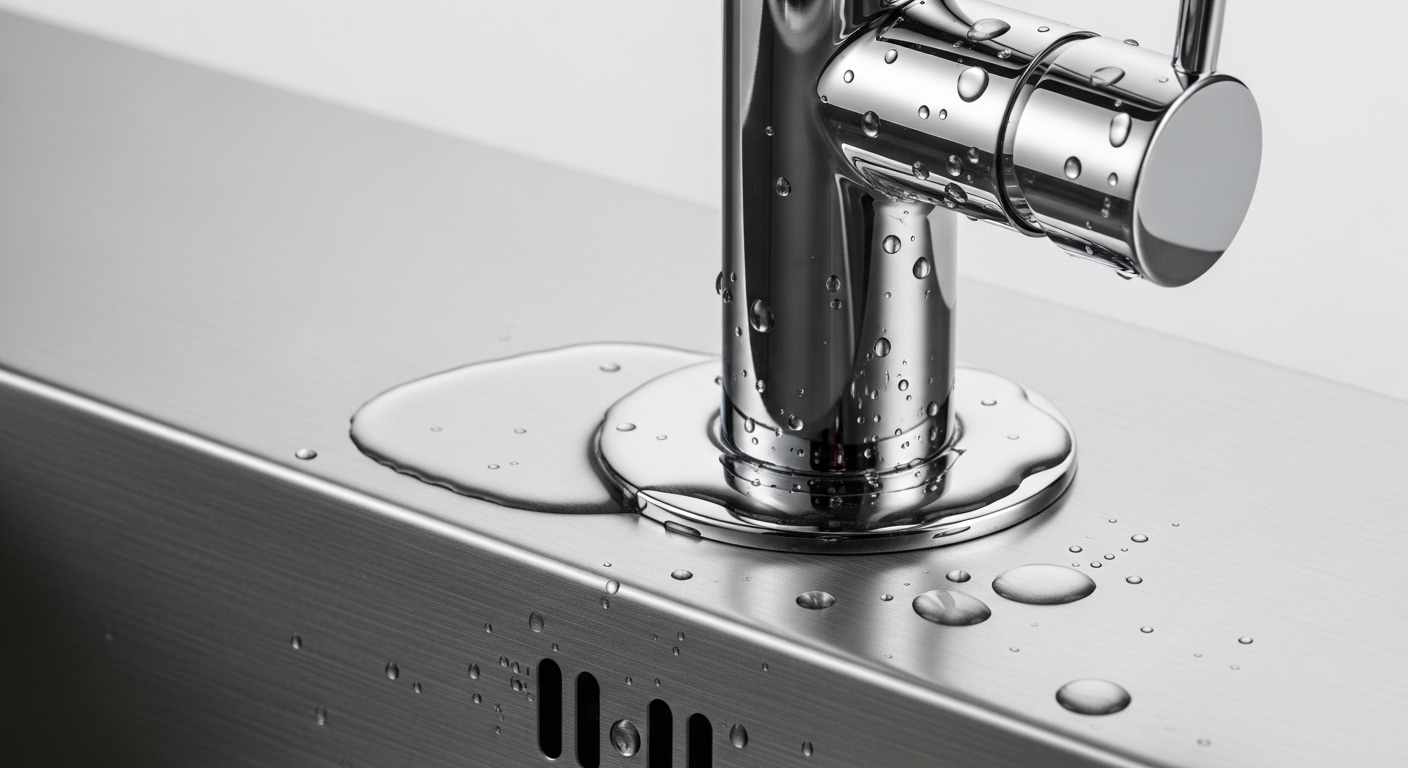
If your kitchen faucet is leaking at the base — that thin ring of water pooling around the bottom of the spout every time you turn on the tap — the good news is that this is one of the most common and most fixable faucet problems there is. In nearly every case the culprit is a rubber O-ring or a cartridge seal that has hardened, cracked, or slipped out of place after years of hot water and mineral buildup. You very rarely need a new faucet, and you almost never need a plumber. Below, we’ll walk through exactly why it happens, how to diagnose which part failed, and how to fix it step by step.
At Avovida, we design and stress-test kitchen and bathroom fixtures for a living, so we see the exact wear patterns that cause base leaks every day. This guide distills what our product engineers actually check first.
What actually causes a kitchen faucet to leak at the base — not from the spout?
A leak at the base (rather than dripping from the spout end) means water is escaping from inside the faucet body and traveling down instead of out. The two overwhelming causes are a failed spout O-ring and a worn cartridge. Both are cheap rubber-and-plastic parts that wear out on a schedule.
Here’s the mechanical reason. On most modern single-handle faucets, the spout swivels on the faucet body, and two or three O-rings create the watertight seal between the moving spout and the stationary base. Every time you swing the faucet left and right to fill a pot or rinse a sink, those O-rings rub. Over 5–8 years the rubber loses its elasticity, flattens, or tears — and pressurized water finds the path of least resistance straight down to the base.
The other suspect is the cartridge, the valve that mixes hot and cold and shuts the water off. When its internal seals degrade, water can weep up through the handle area and out around the base, especially when the handle is on. Hard water accelerates both failures because mineral scale acts like sandpaper on rubber and grit inside the valve.
- Worn spout O-rings — the #1 cause; the leak gets worse when you swivel the spout.
- Failed cartridge seals — leak appears or worsens when the handle is turned on.
- Loose mounting nut — the whole faucet wobbles, breaking the base gasket seal.
- Mineral scale / hard water — chews up rubber and scratches valve surfaces early.
- Old plumber’s putty or a failed base gasket — lets water seep back under the deck plate.
How do I know if it’s the O-ring or the cartridge?
Do a two-minute test: dry the base completely with a towel, then turn the faucet on and swivel the spout side to side. If water reappears at the base mainly when you swing the spout, it’s the O-rings. If water shows up the moment the handle is on and the spout is dead-still, suspect the cartridge.
A third quick check rules out a false alarm. Wipe everything dry, then run water and look underneath the sink with a flashlight. If the base stays dry up top but you find water down below at the braided supply lines, you don’t have a base leak at all — you have loose supply connections, which is a different (and even easier) fix covered in our guide on how to fix a leaking tap valve yourself.
Quick diagnostic table: match the symptom to the part
| What you observe | Most likely cause | Part / fix needed |
|---|---|---|
| Leak grows when you swivel the spout | Worn spout O-rings | O-ring kit + plumber’s grease |
| Leak appears whenever the handle is on | Degraded cartridge seals | Replacement cartridge |
| Faucet wobbles / rocks on the sink | Loose mounting nut, broken deck seal | Tighten nut, re-seat gasket |
| Water only under sink, base stays dry | Loose supply lines | Tighten fittings / new hose |
| White crust around base, slow weep | Hard-water scale on seals | Descale + new O-rings |
How do I fix a kitchen faucet leaking at the base myself, step by step?
You fix a base leak by shutting off the water, removing the spout, and replacing the worn O-rings (or the cartridge) — a 30–60 minute job with basic tools. Here’s the full sequence for the most common repair: replacing the spout O-rings on a single-handle faucet.
- Shut off the water. Turn both shutoff valves under the sink clockwise until they stop. Open the faucet to release pressure and confirm the water is truly off.
- Plug the drain and lay down a towel. This keeps the tiny retaining clip and screws from disappearing down the drain — a classic mistake.
- Remove the handle. Pop off the decorative cap, loosen the set screw with an Allen (hex) wrench, and lift the handle off.
- Take off the spout. Unscrew or unclip the retaining collar/nut, then pull the spout straight up off the faucet body. You’ll now see the O-rings seated in grooves on the brass stem.
- Replace the O-rings. Roll the old ones off with a small flat screwdriver, note their sizes, and slide the matching new ones into the grooves. Coat each new O-ring with a thin layer of silicone plumber’s grease so it seals and swivels smoothly.
- Reassemble in reverse. Slide the spout back down, reattach the collar, handle, and set screw. Don’t overtighten — snug is enough.
- Test. Slowly reopen the shutoff valves, run the faucet, swivel the spout, and watch the base for 60 seconds. Dry means done.
If the diagnosis pointed to the cartridge instead, the first four steps are identical; you then pull the retaining clip, extract the old cartridge with pliers (or a cartridge puller for stuck ones), and drop in an exact replacement — orientation matters, so line up the tabs the same way the old one came out. Whichever repair you’re doing, having the right small parts on hand matters; our breakdown of the essential chrome faucet parts shows what each component looks like so you order the correct one.
What tools and parts do I need, and what will it cost?
You need very little: expect to spend $5–$20 on parts and to already own most of the tools. Here’s the full shopping list.
- Manufacturer O-ring kit or universal O-ring assortment — $5–$12
- Replacement cartridge (only if the cartridge failed) — $10–$40 depending on brand
- Silicone plumber’s grease — $4–$7
- Allen/hex wrench set — often included with the faucet
- Adjustable wrench or channel-lock pliers
- Small flat-head screwdriver and a flashlight
- White vinegar for descaling any mineral crust — pennies
Compare that to a plumber’s typical $150–$350 minimum call-out for the same job, and the case for a DIY fix is obvious for anyone comfortable holding a wrench.
When should I just replace the whole faucet instead of repairing it?
Repair is the right call about 90% of the time, but replace the faucet if the body itself is cracked, if the finish is corroding through, or if replacement cartridges are discontinued for an old off-brand model. A leak caused by a fractured brass or zinc body can’t be sealed with a new O-ring — and cheap zinc bodies are especially prone to hairline cracks over time.
Age and quality drive the decision. A well-made brass-bodied faucet is worth repairing for 15–20 years; a bargain-bin faucet that’s already leaking at year three usually signals more failures ahead. If you’re weighing an upgrade, it’s worth understanding how build quality differs between the big names — our comparison of Moen vs Kohler kitchen faucets lays out what real owners say about long-term durability and how easy each brand’s cartridges are to source years later.
Does hard water make base leaks come back faster?
Yes — hard water is the single biggest reason a repaired base leak returns. Dissolved calcium and magnesium form scale that abrades rubber O-rings and pits the smooth valve surfaces the cartridge seals ride against, so seals that should last 6–8 years can fail in 2–3.
If you’re on hard water, three habits stretch the life of your repair: use silicone (not petroleum) grease on new O-rings, descale the spout stem with vinegar whenever you’re in there, and consider a whole-house or under-sink softener/filter. Choosing fixtures with solid brass bodies and ceramic-disc cartridges also helps, since ceramic tolerates grit far better than older rubber-washer designs.
How do I stop a kitchen faucet base leak from happening again?
Prevention comes down to two things: don’t overtighten during reassembly, and re-grease the O-rings every time you service the faucet. Overtightening the spout collar or mounting nut deforms the very gaskets that keep the base dry, and a dry O-ring wears out in a fraction of the time a greased one does.
A quick annual habit helps too. Once a year, wipe the base dry and check for early weeping; catching a tired O-ring before it fails outright means a two-minute swap instead of water damage to your sink cabinet. If you ever notice the faucet starting to wobble, snug the mounting nut underneath right away — a loose faucet is the fastest way to break the deck-plate seal and start a fresh base leak.
FAQ
Is a kitchen faucet leaking at the base dangerous or an emergency?
It’s not an emergency, but don’t ignore it. A slow base leak won’t flood your kitchen, yet the water can seep under the deck plate into the sink cabinet, warping the wood and breeding mold over months. Turn the faucet off between uses if the leak is steady, and plan to fix it within a week or two.
Can I fix a faucet base leak without turning off the water?
No. You must shut off both under-sink supply valves before removing the spout or handle, or you’ll get sprayed with pressurized water the instant the seal is broken. If the under-sink valves are stuck or missing, shut off the home’s main water supply instead.
Why is my faucet leaking at the base only when the water is running?
That pattern almost always means worn spout O-rings or a failing cartridge. When the water is off there’s no pressure pushing against the failed seal, so the base stays dry; turn the tap on and the pressurized water immediately finds the gap and travels down to the base.
How long does it take to fix a kitchen faucet leaking at the base?
Most people finish in 30 to 60 minutes. An O-ring swap on a familiar single-handle faucet can take as little as 20 minutes; a stuck cartridge that needs a puller, or a first-time repair where you’re identifying parts, runs closer to an hour. Sourcing the exact replacement part ahead of time is what saves the most time.
What’s the difference between a base leak and a leak under the sink?
A base leak shows water pooling on top of the sink around the faucet’s bottom and comes from worn internal seals. Water found only in the cabinet below, with a dry base up top, comes from loose braided supply-line connections or a bad valve — a separate, usually quicker fix. Always dry both spots and run the faucet to see where the water truly originates before you start.
Does the Avovida warranty cover a leaking faucet base?
Avovida faucets carry a limited lifetime warranty covering the finish and function, including seals and cartridges that fail under normal use. Damage from hard-water scale neglect or improper installation isn’t covered, which is exactly why we recommend annual descaling and greased O-rings. Keep your proof of purchase and reach out through avovida.net if you think a defect is at play.
About the author & our testing: This guide was written by the Avovida product team, who design, spec, and endurance-test kitchen and bathroom fixtures. Every Avovida faucet cartridge is cycle-tested well beyond the industry-standard 500,000 open/close cycles, and our valves meet ASME A112.18.1 / NSF 61 requirements for drinking-water safety. We repair, tear down, and analyze returned faucets to understand real-world wear — the same hands-on experience behind every step above.