
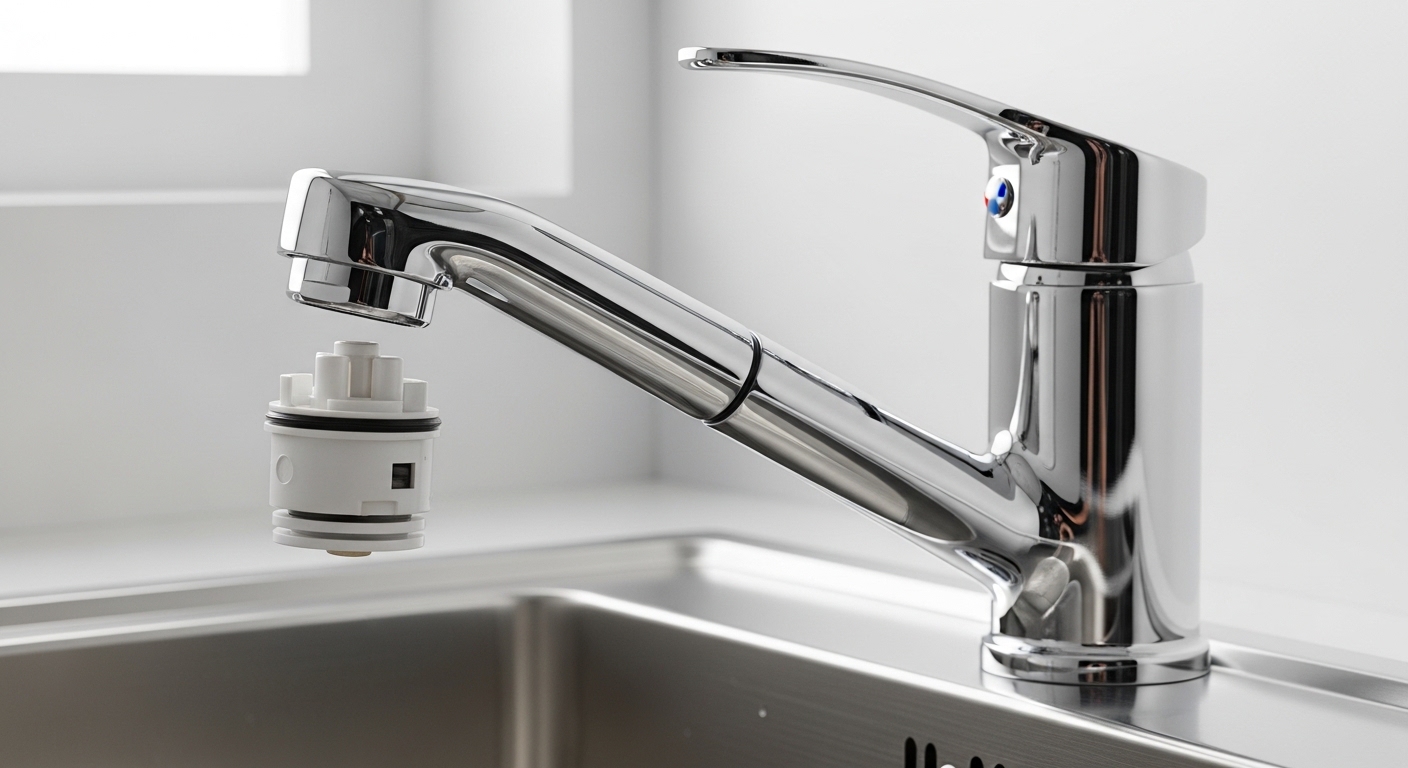
If your Artika faucet drips even when the handle is fully off, feels gritty when you turn it, or won’t shut off hot and cold cleanly, an artika faucet cartridge replacement is almost always the fix — not a whole new faucet. The cartridge is the small valve inside the faucet body that controls water flow and temperature, and it’s the first part to wear out. Below, we’ll walk through exactly how to identify your cartridge, remove it without stripping anything, install the new one correctly, and avoid the two mistakes that turn a small drip into a bigger leak.
How Do I Know if My Artika Faucet Actually Needs a New Cartridge?
You need a new cartridge if the faucet drips with the handle off, is hard to turn, mixes hot and cold poorly, or leaks from under the handle. Those are all classic worn-cartridge symptoms, not a body or supply-line problem.
Before you buy anything, rule out the cheaper culprits. A weak, sputtery stream is usually a clogged aerator, not the cartridge — unscrew the tip and rinse the screen first. Water pooling around the base of the faucet points to a worn base gasket or mounting seal instead. But if the specific complaint is dripping from the spout after you’ve shut the handle all the way off, or a handle that grinds and won’t reach a comfortable temperature, that’s the cartridge’s ceramic discs wearing down, and replacement is the right call.
Here’s a quick self-check: with the water supply on, turn the handle fully off and dry the spout. Watch for 60 seconds. A steady drip = cartridge. If instead the drip is at the base or under the deck, that’s a different repair — our guide on why a kitchen faucet leaks at the base covers that scenario in detail.
What Tools and Parts Do I Need for an Artika Cartridge Replacement?
You need the correct replacement Artika cartridge plus four basic tools: an Allen (hex) key, a Phillips screwdriver, channel-lock or needle-nose pliers, and plumber’s grease. Total cost for the part is usually $12–$30.
Don’t guess on the cartridge. Artika sells several models — single-handle pull-down kitchen faucets, bar faucets, and bathroom lav faucets — and they don’t all use the same valve. Buying the wrong size is the number-one reason a “quick fix” turns into a second trip to the store.
- Replacement cartridge — matched to your exact faucet model (see the next section on how to find it).
- Allen/hex key set — most Artika handles use a small set screw, often 2.5mm or 3mm.
- Phillips screwdriver — for the handle screw hidden under the cap.
- Channel-lock or needle-nose pliers — to grip and pull the cartridge stem straight up.
- Silicone plumber’s grease — a dab on the new O-rings makes it seat smoothly and last longer.
- A rag and a bowl — to plug the drain (so screws don’t fall in) and catch residual water.
Skip petroleum jelly as a substitute for plumber’s grease — it degrades rubber O-rings over time. A $6 tube of silicone grease is worth it.
How Do I Find the Right Replacement Cartridge for My Artika Model?
Find your Artika model number first — it’s usually printed on a sticker on the supply lines, under the sink on the faucet shank, or on the original box or manual — then match the cartridge to that model on Artika’s site or the retailer where you bought it. If you can’t find a number, remove the old cartridge and match it by physical dimensions.
Artika cartridges are almost all ceramic disc type, which is what you want — they outlast old rubber-washer compression valves by years. What varies is the diameter, the stem shape, and the length. When matching, measure three things on the old cartridge: overall length, body diameter, and the shape of the top stem (broach) where the handle attaches.
A practical tip: take the old cartridge with you or photograph it next to a ruler. If you’re the type who’d rather understand the whole valve assembly before you order, it’s worth skimming which chrome faucet parts you need to know before a repair — the terminology (cartridge, retaining nut, bonnet, O-ring, escutcheon) carries straight over to Artika faucets and makes ordering the right part far less confusing.
| Cartridge Type | Common Use in Artika Faucets | Lifespan | Best For |
|---|---|---|---|
| Ceramic disc (single-lever) | Most single-handle kitchen & pull-down faucets | 10–15+ years | Durability, smooth handle feel |
| Ceramic disc (compact/bar) | Bar and prep faucets, smaller lav faucets | 10–15 years | Tight installs, lower flow fixtures |
| Two-handle stem cartridge | Widespread bathroom faucets (separate hot/cold) | 8–12 years | Independent temperature control |
Step by Step: How Do You Actually Replace an Artika Faucet Cartridge?
Turn off the water, relieve pressure, remove the handle, pull the old cartridge, seat the new one in the same orientation, and reassemble. Here’s the full sequence so nothing goes wrong.
- Shut off the water. Turn both supply valves under the sink fully clockwise. Then open the faucet handle to release the pressure and drain the line. If your shut-offs are seized or missing, close the home’s main.
- Plug the drain. Drop a rag or a drain stopper in the sink so no small screws disappear down it. This one-second step saves a lot of frustration.
- Remove the handle cap. Most Artika handles have a small decorative cap (often marked with a red/blue indicator). Pry it off gently with a flat screwdriver or your fingernail to expose the set screw.
- Loosen the set screw. Use the Allen key to back out the handle set screw. You usually don’t need to remove it completely — just enough to lift the handle off. Set it somewhere it won’t roll away.
- Lift off the handle. Pull it straight up. If it’s stuck from mineral buildup, wiggle gently — don’t pry hard against the finish.
- Remove the retaining nut or clip. Under the handle you’ll find either a threaded retaining nut (unscrew counterclockwise with channel-locks) or a horseshoe-shaped brass clip (pull it out with needle-nose pliers). Note which one you have — you’ll reverse this on reassembly.
- Pull the old cartridge straight up. Grip the top stem with pliers and pull upward with steady force. It may resist due to O-ring friction or scale. Rock it slightly side to side, but keep the pull vertical so you don’t crack the housing.
- Note the orientation. Before it’s fully out, look at any alignment tabs, flats, or notches and how they line up. The new cartridge must go in the same way — install it 180° off and your hot and cold will be reversed.
- Clean the pocket. Wipe out mineral deposits inside the faucet body with a rag. A little white vinegar on a cloth dissolves hard-water scale on the sealing surfaces.
- Grease and insert the new cartridge. Wipe a thin film of silicone plumber’s grease on the O-rings, then press the new cartridge in, matching the orientation you noted. It should seat fully and evenly with light pressure.
- Reinstall the clip/nut, handle, and cap. Reverse steps 6 through 3. Snug the retaining nut firmly but don’t overtighten — hand-tight plus a quarter turn is plenty on plastic threads.
- Turn the water back on slowly. Open the shut-offs gradually with the faucet handle in the on position, let air burp out, then run hot and cold and check for drips.
If you’re a visual learner and want to watch it before you try, that’s reasonable — just be selective. We wrote a candid take on whether you can really fix a leaky faucet from a YouTube video or make it worse, and the short version is: yes, if the video matches your exact valve type. A generic Moen tutorial won’t show the Artika retaining clip correctly.
What Are the Most Common Mistakes During an Artika Cartridge Swap?
The three mistakes that cause a “fixed” faucet to leak again are installing the cartridge in the wrong orientation, overtightening the retaining nut and cracking it, and reusing dry, old O-rings without grease. All three are avoidable.
- Reversed hot and cold. If the cartridge has an alignment tab, it only truly seats one way — force it in wrong and it either leaks or swaps your temperatures. Match the notch before you push.
- Overtightening. Artika retaining nuts are often plastic or thin brass. Cranking down with full leverage cracks them, and then you have a leak that no cartridge will fix. Snug is enough.
- Skipping the grease. Dry O-rings drag going in, can tear, and wear fast. A thin silicone film is non-negotiable for a lasting seal.
- Not flushing the line. After turning the water back on, run the faucet 15–20 seconds to clear debris before judging whether it drips. Trapped grit can cause a temporary weep that clears itself.
- Buying a “universal” cartridge. These rarely fit Artika bodies precisely. Match the real part.
Is Replacing the Cartridge Worth It, or Should I Just Buy a New Faucet?
Replacing the cartridge is worth it in the vast majority of cases — a $15–$30 part and 30 minutes beats a $150+ faucet plus reinstallation. Replace the whole faucet only if the body itself is cracked, the finish is failing badly, or you’ve already swapped the cartridge and it still leaks from the base.
Think of the cartridge as the faucet’s engine. A worn cartridge in an otherwise solid Artika faucet is like a dead battery in a good car — you don’t scrap the car. The exception is genuine body damage or corrosion, or if you simply want a new look or feature (like going touchless). If you’re weighing an upgrade anyway, it’s worth reading how real owners feel about it in our roundup of what Reddit actually says about Moen vs Kohler kitchen faucets before you spend more than you need to.
How long should a new Artika cartridge last?
A quality ceramic-disc cartridge typically lasts 10–15 years. If yours failed much sooner, hard water is usually the reason — mineral scale grinds the ceramic discs. A whole-house or under-sink filter, or simply cleaning the aerator and cartridge yearly, extends its life significantly.
FAQ
Can I replace an Artika faucet cartridge myself without a plumber?
Yes. An Artika faucet cartridge replacement is one of the most DIY-friendly plumbing repairs there is. If you can use an Allen key and pliers, you can do it in 20–30 minutes. The only time to call a pro is if the shut-off valves are seized, the cartridge is fused with corrosion and won’t budge, or the faucet body itself is cracked.
How do I know which Artika cartridge I need if I lost the manual?
Remove the old cartridge and match it by three measurements: overall length, body diameter, and the top stem (broach) shape. Photograph it next to a ruler and compare against Artika’s replacement parts listings, or check the model number sticker on the supply lines or the faucet shank under the sink. Avoid “universal” cartridges — they rarely seat correctly in Artika bodies.
Why is my Artika faucet still dripping after I replaced the cartridge?
Usually one of three things: the cartridge isn’t fully seated, it’s installed in the wrong orientation, or debris is trapped on the sealing surface. Turn off the water, pull the cartridge, confirm the alignment notch, wipe the pocket clean, add a thin film of silicone grease, and reseat it. If it still drips, check that the retaining nut isn’t cracked from overtightening.
Do I need to turn off the main water supply?
Not usually — the two shut-off valves under the sink are enough. Turn them fully clockwise, then open the faucet to relieve pressure. Only shut off the home’s main if the under-sink valves are missing, stuck, or won’t fully close.
Is a ceramic cartridge better than a rubber-washer valve?
Yes. Ceramic-disc cartridges, which Artika uses, seal with two polished ceramic plates and typically last 10–15+ years with a smoother handle feel. Old-style rubber compression washers wear out in a couple of years and drip more often. If you’re upgrading an ancient faucet, ceramic is the clear winner.
How much does an Artika cartridge replacement cost?
The part alone runs about $12–$30 depending on the model. Doing it yourself, that’s your total cost. Hiring a plumber typically adds $75–$150 in labor, which is why this is such a worthwhile DIY — the part is cheap and the job is genuinely simple.
Author note: This guide was written by the Avovida fixtures team, drawing on hands-on repair of single-handle and two-handle faucets across major brands. We’ve replaced ceramic cartridges on kitchen, bar, and bathroom faucets and documented the failure patterns that show up most often with hard water.
About Avovida: Avovida (avovida.net) is a specialist retailer and resource for faucets, shower heads, and bathroom fixtures. Our repair guides are built around real parts and real symptoms, not generic filler. Ceramic-disc cartridges like those in Artika faucets are commonly tested against standards such as ASME A112.18.1/CSA B125.1 for durability and leak performance, and most faucet cartridges are covered under the manufacturer’s limited warranty — always check whether your Artika faucet is still in warranty before buying a replacement part, since a covered cartridge may ship free.